Logic Grids:
I finally just started going over the grid puzzles in class each week. I intend to slow them down some in these as I'm just not seeing complete understanding of how to work these types of puzzles. I had envisioned working on problem areas in class with them each week, but since everyone has been coming to class with the puzzles completely worked already week after week, that just hasn't been feasible. Apparently, at least some parents were helping with the puzzles too often and the kids were just not picking up on how to do them on their own.... It's not the correctly worked puzzles that I care about at all; it's the reasoning that's going on in getting to that point....
I sent them home with several puzzles this week. I asked that they try to work the puzzles completely on their own and bring them to class only partially completed if they get stuck. It is in looking back through the process together that we can help each other think about how to reach the conclusions to the puzzles.
Detective Stories:
We talked a little about Father Brown and I think everyone agrees that they prefer Sherlock Holmes (me, too). I have asked them to read the next Sherlock Holmes story for next week: "The Beryl Coronet." Of course, the first thing they need to do is figure out what a "beryl coronet" is!
Words to know:
remunerative, pg. 104
unimpeachable, pg. 105
plate, pg. 105 (http://en.wikipedia.org/wiki/Plate - which is it, do you think?)
parley, pg. 105
imprudence, pg. 107
Stop at page 112 - do you see a potential red herring here? What about a definite suspect?
tenable, pg. 115
diadem, pg. 119
will-o'-the-wisp, pg. 120
Were you surprised by this one? or had you guessed before the end?
Logical Fallacies:
We reviewed "appeal to the people" today with some examples and talked about its opposite: snob appeal (which was the fallacy alluded to in the Father Brown story). We also talked about its cousin: "bandwagon." We will look at some more specific examples of those two fallacies next week.
Please look for one example of "snob appeal" this week (print, TV, billboards, something in a conversation - doesn't matter where you find it), and one example of "bandwagon" (or appeal to the people; they are synonymous.)
Here's a bit more info on the effect that "bandwagon" can have on people psychologically:
http://www.wisegeek.com/what-is-a-bandwagon-effect.htm
Wrap-up:
They got to play through a complete round of "Clue" today. I wanted a chance to observe how they use their checklists to cross suspects off their lists as they play. I'm seeing a little of the same thing that I see happening with the grid puzzles. Folks get a little too "x-happy" and cross off too many things, too quickly. I think that slowing down and double checking to make sure that only those boxes for which we have found an answer are crossed out will go a long way toward helping with the grid puzzles (as well as in Clue). Also, there is some failure to cross off things when a clue has been found that eliminates them. While that is to be expected in the excitement of the chatter that accompanies a group event, I'm hopeful that they will slow down and remember to cross things off for each clue (or at least be able to make a helpful note for each clue) as they read through a puzzle. The puzzles are not timed. They don't need to feel that they have to rush through them or even that they have to finish them if they are stuck. Thinking takes time!
Regena
Thursday, October 25, 2012


Ancient History and Geography
We've continued moving through the ancient world with a week's study of India and a couple of weeks spent on Ancient China. We then detoured for a week from SOTW in order to study Megalithic Europe from the end of the Stone Age through the Bronze Age and into the beginnings of the Iron Age. Next week, my student is going to take a look at the Aegean region and the Phoenicians.
Here are some of the books we've used for these studies:
(My library website creates bibliography lists now!)
Ancient India:
Ancient India.New York :Rosen Pub.,2009.



Here are some of the books we've used for these studies:
(My library website creates bibliography lists now!)
Ancient India:
Ancient India.New York :Rosen Pub.,2009.
In the heart of the village : the world of the Indian Banyan tree.San Francisco :Sierra Club Books,1996.
One grain of rice : a mathematical folktale.New York :Scholastic Press,c1997.
Hindu stories.Minneapolis :Picture Window Books,2006.
Seasons of splendour : tales, myths & legends of India.New York :Atheneum,c1985.
What you will see inside a Hindu temple.Woodstock, Vt. :SkyLight Paths Pub.,2005.
How Ganesh got his elephant head.Rochester, Vt. :Bear Cub Books,c2003.
Divali.Austin, Tex. :Raintree Steck-Vaughn,c1998.
Sacred river.New York :Clarion Books,1995.
One world, many religions : the ways we worship.New York :Knopf,1996.
Ancient India.New York :Franklin Watts,c2005.
The gifts of Wali Dad : a tale of India and Pakistan.New York, N.Y. :Atheneum Books for Young Readers,c1995.
Rama and the demon king : an ancient tale from India.New York :DK Ink,1997.
The rumor : a Jataka Tale from India.Toronto, Ont. :Maple Tree Press,2002.
The very hungry lion : a folktale.Toronto ;:Annick Press,c1996.
Plus SOTW ch. 9
Ancient China, Week I:
Science in ancient China.New York :F. Watts,c1988.
China's first Emperor : Shi-Huangdi.Peterborough, NH :Cobblestone Pub.,1997.
Daoism.Peterborough, NH :Cobblestone Pub.,2000.
The greatest treasure.New York :Scholastic Press,1998.
The legend of Lao Tzu and the Tao te ching.New York :Margaret K. McElderry Books,2007.
The magic pillow.New York :Margaret K. McElderry Books,c2008.
The stonecutter.New York :Crown Publishers,c1995.
A Chinese zoo : fables and proverbs.San Diego :Harcourt Brace Jovanovich,c1987.
The magic tapestry : a Chinese folktale.New York :Holt,c1994.
Liang and the magic paintbrush.New York :Holt, Rinehart, and Winston,c1980.
The emperor's new clothes : a tale set in China.New York :McElderry Books,c2000.
The magic boat.New York :Holt,c1990.
Su Dongpo : Chinese genius.New York :Lee & Low Books,c2006.
The boy who painted dragons.New York :Margaret K. McElderry Books,2007.
The gods and goddesses of ancient China.New York :Holiday House,2003.
See inside an ancient Chinese town.New York, N.Y. :Warwick Press,1986.
You are in ancient China.Chicago, Ill. :Raintree,c2005.
You wouldnt' want to work on the Great Wall of China! : defenses you'd rather not build.New York :Franklin Watts,2006.
The emperor's silent army : terracotta warriors of Ancient China.New York :Viking,c2002.
Plus SOTW ch. 10
Ancient Chine, Week II:
The hunter : a Chinese folktale.New York :Atheneum Books for Young Reader,c2000.
The beggar's magic : a Chinese tale.New York :M.K. McElderry Books,c1997.
The cricket's cage : a Chinese folktale.New York :Hyperion Books for Children,1997.
The empty pot.New York :H. Holt,c1990.
The Chinese book of animal powers.New
York :HarperCollinsPublishers,1999.
Ten suns : a Chinese legend.New York :Holiday House,1998.
The seven Chinese brothers.New York :Scholastic Inc.,c1990.
White wave : a Chinese tale.New York :Crowell,c1979.
The jade stone : a chinese folktale.New York :Holiday House,c1992.
Chinese children's favorite stories.Boston :Tuttle Pub.,c2004.
Mouse match : a Chinese folktale.San Diego :Silver Whistle,c1997.
The lost horse : a Chinese folktale.San Diego :Silver Whistle/Harcourt Brace,c1998.
I also used a map I found at Scholastic for this second week, as well as some Chinese coins I have at home, and some things from the Ancient China Treasure Chest.
(I wasn't really looking for a Kungfu Panda theme, but if you don't mind it, then some of the other activities might be usable, too):
Here's a set of shaped coins such as I have:

I also have the more typical round coins which have been in use longer:

Treasure Chest:
Megalithic Europe:
Stone Age farmers beside the sea : Scotland's prehistoric village of Skara Brae.New York :Clarion Books,1997.
The names upon the harp : Irish myth and legend.New York :Arthur A. Levine Books,c2000.
Gilly Martin the Fox.New York :Hyperion Books for Children,c1994.
In search of ancient Ireland [DVD].Visual Materials.PBS DVD Video ;,c2003.
Myths and civilization of the Celts.New York :Peter Bedrick Books,1999.
What do we know about the Celts?.New York :P. Bedrick Books,1993.
Celtic memories.Cambridge, MA :Barefoot,2003.
The witches and the singing mice.New York :Dial Books for Young Readers,1993.
Stonehenge.Farmington Hills, MI :KidHaven Press,c2006.
Life of the ancient Celts.New York :Crabtree Pub. Co.,c2005.
The Pictish child.San Diego :Harcourt, Inc.,1999.
In class, I used The First Europeans, Renzo Rossi and Andrea Due, to help me tell the story of the peoples who inhabited both mainland Europe and the British Isles/Ireland. I will also be using this book again next week.
I also sometimes utilize 100 Greatest Archaeological Discoveries, Jacqueline Deneen.
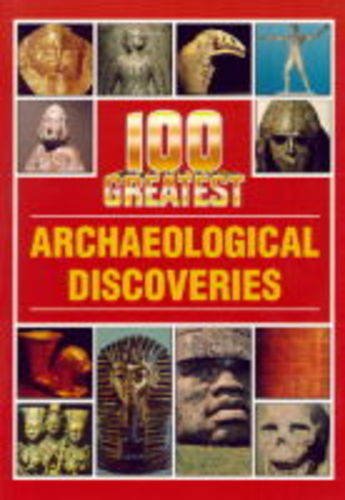
Over the summer, I found this book on sale for a couple of bucks, so I purchased it for my student to take home, too:
Aegean Civilizations / Phoenicians:
Story of the World chs. 15 and 18
Atlantis : the legend of a lost city.New York :Holt,2000.
The hero and the minotaur : the fantastic adventures of Theseus.New York :Dutton Children's Books,c2005.
Theseus and the Minotaur.New York :Holiday House,c1988.
Theseus and the Minotaur.New York :M.K. McElderry Books,c1989.
Atlantis.Mankato, Minn. :Capstone Press,c2007.
The Phoenicians.Englewood Cliffs, N.J. :Silver Burdett Press,1989.
There's a monster in the alphabet.Boston :Houghton Mifflin,2002.
Black ships before Troy : the story of the Iliad.New York :Delacorte Press,2004, c1993.
The Minoans.Peterborough, NH :Cobblestone Pub.,2000.
The Phoenicians.Peterborough, NH :Cobblestone Pub.,1996.
The true story of Troy [DVD].Visual Materials.History Channel :,[2007].
In search of ancient Crete.Morristown, N.J. :Silver Burdett,1985.
Wings.San Diego :Harcourt Brace Jovanovich,c1991.
(I'm bringing in some Greek mythology that deals with Troy, Crete, etc. as well as some conjecture about Atlantis....)
We'll be finishing out this semester by taking a look at Ancient Africa, will finsh up Egyptian studies by taking a look at the Middle and New Kingdoms, then we'll be getting into our Greek studies....
Regena
Friday, October 5, 2012
Geology for Grades K-2
Listed below are some of the resources I've been using to teaching geology to littles this year.
Before class started, I sent out this reading list to help students get ready for our first topic, Dirt:
We looked at sand samples from around the world to see how the different minerals and rocks can make the beach of any given lake, river, or ocean area different in terms of both color and texture.
For week three, we finished up talking about other ways we use minerals in our lives every day(graphite in pencils; sulphur in matches; gypsum in wallboard, insulation, and other building materials, etc.) .
Before class started, I sent out this reading list to help students get ready for our first topic, Dirt:
A Handful of Dirt, Raymond Bial (good! comprehensive - lots of photographs)
Dig In! Learn About Dirt, Pamela Hall
Dig In! Learn About Dirt, Pamela Hall
Talkabout Soil, Angela Webb
Simply Science: Soil, Alice Flanagan
Sand, Ellen Prager (good! lots of close-ups of different types of sand grains)
Sand, Ellen Prager (good! lots of close-ups of different types of sand grains)
And if you'd like to read more about the sorts of life found living in dirt and sand, you might like to read one or more of these books, too:
Under the Ground, Gallimard Jeunesse and Pascale de Bourgoing
Animals Under the Ground, Allan Fowler
Tiny Life on the Ground, Mary Dodson Wade - this one talks a little about the bacteria and fungi found in soil. You might find it interesting to put some damp soil in a jar (with air holes in the lid) and keep it damp for some time in order to watch what will grow out of it.... Don't breath in spores, though!
CLASS ONE
For the first day of class, I asked everyone to bring a magnifying glass, if they had one. I had several, but thought they might like to have their own along.... I also asked them to bring about three tablespoons of soil from their yards in a Ziploc type bag if possible....
In class the first day, we sorted through our soil samples and looked at them with hand lenses. We also looked at both dirt and sand under the microscope. The children used a little journal to record what they saw. It will stay at my house until nearer the end of class as we will use it some during most weeks.
I used pages I found at Kindergarten...kindergarten...(thank you!) to create the journals I am using with the children:
We saw many cool things, such as pieces of leaf, pine needles, pieces of egg shell, small rocks, plant fibers and roots, catkins from trees, pieces of bark, etc., but I think the coolest thing we found was a tiny, tiny perfect snail shell!
We used a vocabulary card set I made up regarding dirt and the various aspects of dirt, soil, mud: organic vs. inorganic components and what some of them constitute, etc. I gave each of them a vocabulary list that contains the same info that is on the cards, so that parents can work with them on that at home to build greater understanding about the components of soil.
We started a soil horizons flip book, but ran out of time to finish it. I sent those home to be finished, but invited them to bring them back to go over with me if they wanted. The different levels included were: humus, topsoil, subsoil, and bedrock. They can wrote the titles in on each different colored strip, drawing in some details, then added the definitions to the back of each strip. We used markers and crayons to draw on each level. The black level can be left plain, just writing in "bedrock" on it (we used a white crayon to do this). The subsoil level would just show some larger rocks mixed into the soil. There might also be some plant roots reaching down into it. The topsoil level would include lots of living roots, as well as some of the things we found in our soil today, such as bits of small rock, shell, plant fibers and fragments, roots, and perhaps other things we didn't see, such as animal hair, dung, feathers, etc. There would also be live critters in that level. The humus level is where even more of the living plants and animals would be found, and in greater variety (at least for the visible ones).
I got the idea for this Soil Horizon flip book from Third Grade Thinkers (thank you!):
I sent everyone home with a jar with some dirt in it. I combined their dirt with mine and one other child's who had a very heavy clay (so that they could see separation of heavier from lighter soils, floating humus, etc.) I asked them to please add more dirt to make the jar about 1/3 full, then finish filling it with water, put on the lid, and shake well. I asked them to let it settle out for a day or two and draw/write what they saw on the experiment sheet I sent home, bringing it back to share at the next class.
I asked them to note if they saw clay, silt, and/or sand in their sample. What about humus?
I asked them to note if they saw clay, silt, and/or sand in their sample. What about humus?
Here is the worksheet I used for this:
I only used the first page with the littles. Here is their website, too. You might find the info there helpful and there are loads of other experiments and activities: http://www.soil-net.com/
In order to get an optimum level of settling and layers in the jar, I asked them to let their jar sit quietly for about 3 days total, then draw what they saw.
After finishing that experiment, I asked them to try something more: take the lid off the jar and gently pour off the excessive water, trying to keep as much soil in the jar as possible (you may have to hold your hand in front of the opening to help prevent it from pouring out with the water).
Now set the jar in a quiet place where it won't be disturbed and where it gets a little light. Leave the lid off. If it seems to dry out too much, add a little water back in but try not to make it soaking wet. Watch it for a couple of weeks, if possible, to see what begins to grow in there:
"Remember all the roots and seeds we found? Perhaps some will sprout. However, there are other things in soil that you didn't see when we looked at it, not even under the microscope. I'm hopeful you will see evidence of some of these.
Parents, I would caution that the children do not hold the opening of the jar up to their noses and breath in (even inadvertently) during this experiment. If we do get various molds and fungi growing in the jars, you really don't want them breathing those spores in.... If anyone has allergies then please use your own discretion in deciding whether or not to attempt this experiment. If you have a quiet place outside where you can leave the jar, so long as you keep it moist, it should work fine there, too...."
We didn't have time to look for tiny living insects, etc. in my humus, but I showed them how to set up an experiment for that during the second class. We did talk a little about the remains of living things found in humus, but didn't get into what living things are there. I sent home a sheet covering what makes soil "alive" and it also details some of the living things found in soil, so I asked them to please take a look at that.
Here's the USDA printable I drew from for this activity:
I only used the "What Makes Soil Alive?" and the "Bugs in the System" pages to make a double-sided hand-out for the children.
We looked at sand samples from around the world to see how the different minerals and rocks can make the beach of any given lake, river, or ocean area different in terms of both color and texture.
We talked about the perfect mix for soil, containing some silt, some clay and some sand. (A good follow-up experiment would be to plant a bean or other sort of seed in a small pot of sand, plant another in some good, rich soil from around your yard, and try to find some heavy clay soil and plant one in that. Compare how the seeds grow in these three components alone, then mix another container with 1/2 soil from your yard, 1/4 clay and 1/4 sand and see how that one grows seeds....)
CLASS TWO
To begin the second class, we talked about their soil horizons books and experiments/worksheets they did at home. I showed them how to create a Berlese funnel to try to drive insects out of humus, or leaf litter. We did see a tiny centipede in my leaf litter, as well as a tiny wolf spider.
If you'd like to try this at home, you can take a funnel and place it over the opening of a jar, or cut the top off a larger bottle and use it as a funnel. If the opening is too large, take two sheets of toilet paper and make a small slit in the middle (along the perforation line) to reduce the size of your opening - place it in the funnel then put the leaf litter in. Sit your funnel under a desk lamp and let it sit for a while, then check your bottle to see what insects have been driven out of the leaf litter.

If you'd like to try this at home, you can take a funnel and place it over the opening of a jar, or cut the top off a larger bottle and use it as a funnel. If the opening is too large, take two sheets of toilet paper and make a small slit in the middle (along the perforation line) to reduce the size of your opening - place it in the funnel then put the leaf litter in. Sit your funnel under a desk lamp and let it sit for a while, then check your bottle to see what insects have been driven out of the leaf litter.
Here's a picture, but they have their light too close! You will melt the plastic and set everything on fire if you do this! Keep an eye on your experiment. You don't need white paper in the bottom of the jar. The insects will just hide in it and you won't be able to see them....
Then we moved on to look at minerals. We sorted them by color and looked at how mineral crystals grow, and how they are used (as gemstones, etc.).
Some reading related to minerals:
Minerals, Roy Gallant
Minerals, Chris and Helen Pellant
The Best Book of Fossils, Rocks, and Minerals, Chris Pellant
We used some of their terms from last week to introduce the topic of minerals: component; organic; chemical structure; and mineral. They did a sort of various items by color, then we sorted out organic from inorganic items. I then told them about the minerals they had sorted, along with the other items that were mixed in with them. We looked at minerals used as gemstones by looking through some of my jewelry and I talked about some of the properties of minerals. I used some cardboard models and an illustration on a website to explain the six basic types of mineral structures (crystal shapes) to them. We talked about how mineral crystals grow and I showed them various geodes filled with different types of minerals and mineral crystals.
Here's the website:
http://www.windows2universe.org/earth/geology/crystal_shapes2.html
I showed them some common table salt crystals I had grown, as well as some Dead Sea Salt crystals. I explained to them how to do the same experiment in order to grow their own crystals. I sent some supplies home with them in case they wish to do this. In order to complete the experiment, please boil some water and fill two glass containers (large coffee cups, old jars, etc.) about 3/4 full of water. Add enough table salt to one of them to saturate it. Stir until as much is dissolved in the water as possible. Place one of the pieces of yarn in the water (get it good and wet). Drape the other end of it into one of the red cups (there will be drainage). You might want to place all this on some sort of cookie sheet or tray, too. Dissolve the Dead Sea Salts I sent home with them into the other container (you probably won't need all of them - there are some rocks mixed in, but they don't matter, so don't worry about them being in there). Do the same thing with the other piece of yarn and cup. You should start seeing crystals developing in just a short time. Let them grow for a week (or more) if you like, and enjoy your crystals! They will grow on the yarn like rock candy. In fact, you could also make some rock candy!
I gave them a couple of sheets that tell more about how some minerals are used and how they are shaped:
(made into a double-sided copy)
A couple of others I pulled from the elementary earth science section of MSNucleus.org.
WEEK THREE
For week three, we finished up talking about other ways we use minerals in our lives every day(graphite in pencils; sulphur in matches; gypsum in wallboard, insulation, and other building materials, etc.) .
Here's a good website children can play with to see some common uses for minerals:
http://www.mineralogy4kids.org/ (primarily the "Minerals in Your House" section, but there's lots more there, too!)
We then began looking at how all that soil and all those minerals get arranged into landforms (or water forms) within our landscapes. We used the Book Geography from A to Z, but didn't cover nearly all of it....
I used a free worksheet on landforms found at www.superteacherworksheets.com:
I also created a set of Montessori landform cards to use in class, as well as a set of water form cards that they could color and take home. This second set was also frowww.superteacherworksheets.com
http://www.superteacherworksheets.com/landforms/bodies-of-water-matching-game.pdf (you have to sign up with them to get these....)
I suggested writing definitions for each form on the back of the cards.... I also gave them the info sheet for parents suggesting different uses for the cards.
If you'd like to check out more info on some landforms or features, here are a couple of other books, too:
Glaciers, Wendell Tangborn
Deserts, Julia Waterlow
Seven Wonders of the Natural World (most are land or water forms), Amy Graham
Next week, we will talk about igneous rocks and wrap by reviewing the rock cycle more thoroughly.
Some books you might consider:
Earth's Rock Cycle, Nancy Allen
Granite and Other Igneous Rocks, Nancy Allen
Igneous Rocks, Holly Cefrey
[For those who have experienced problems with trying to grow crystals, I think I know what the problem is! You must actually boil water on the stove. Heating it (even to boiling) in the microwave just won't work. As soon as it boils, stir in enough salt to saturate, then immediately add the yarn (if they need more, they are welcome to get some from me). Use the plastic cup as a drip cup. If you don't have truly boiling water, and if you don't add the string immediately, you are less likely to get any crystals growing on the string.
While the microwave will heat water to the boiling point, as we've all experience, it cools much more quickly than water heated on the stove. That seems to be the reason water heated in this way won't work....]
After studying igneous rocks, we'll be looking at the layers of the earth and then volcanoes in the last two classes for this group.
Glaciers, Wendell Tangborn
Deserts, Julia Waterlow
Seven Wonders of the Natural World (most are land or water forms), Amy Graham
We talked about landforms in the areas where we live, too, and some began work on a local land form activity I sent home with them. They could use the map on the reverse of that page to pick out other land/water forms we looked at (bays, lakes, peninsulas, capes, etc. They could draw in major rivers on those, too.) We also talked about caves and how many there are in our area.
I created a double-sided worksheet using a map of the U.S. from www.superteacherworksheets.com, and a "Local Landforms" worksheet from www.TeacherVision.com:
Next week, we will be working on sedimentary rocks and perhaps looking at some fossils if we have time.
Let's Go Rock Collecting, Roma Gans (Let's-Read-and-Find-Out series)
And if they'd like to do more experiments with rocks and minerals, here are some additional books:
Explore Rocks and Minerals! Cynthia and Nick Brown
Geology Rocks! Cindy Blobaum
Janice VanCleave's Rocks and Minerals
WEEK FOUR
We began looking at sedimentary rocks. We looked at another sand sample and note booked a little about it. We talked about how the rock cycle works and they note booked a little about that, too.
We looked at lots of different types of sedimentary rocks and talked about how they form. We also looked at some sandstone formations on the Internet. I gave them each a sample of pink sandstone and one of limestone. (I also gave them some mineral samples that I failed to hand out last time.)
We looked at numerous types of fossils, many in limestone, from our area. I gave each of them a shark's tooth. They chose their favorite fossil and note booked about it.
We ran out of time to try creating our own sedimentary rock samples from crayon shavings, but they will be applying the required pressure to achieve those next week. Since we'll be studying metamorphic rocks then, too, we'll go on to "change" those samples into "metamorphic" rock before we're done. I also set up another crystallization experiment for them to follow and we'll open one of those each of the next several weeks. I placed a small amount of sand into several cups and added a saturated Epsom salt solution to them. As the salt/water mixture evaporates, it should begin to cement the sand grains together into a "sandstone." I thought parents might appreciate me leaving that open cup of solution here, LOL, so I spared them transporting it in their cars.... I also began growing Allum crystals to show them....
WEEK FIVE
We reviewed how sediment becomes cemented together by minerals. We talked a little more about different types of salt crystals and checked on the sand that had Epsom salt water added to it. There was a narrow crust on top. I took the rest of those samples out of the little plastic cups they were in so that they can air dry better. We'll see if that helps any when we check them again next week. We looked at some Alum crystals I grew, as well as Halite and Himalayan rock salt....
We reviewed the rock cycle and sedimentary rocks, then talked about the various ways metamorphic rock can be made (and what that term means). We looked at various types of metamorphic rock and attempted making some "rock" samples utilizing time, heat, and pressure. We used a mix of M&M's and marshmallows for one attempt and crayon shavings for another. We saw that this process is very complex and takes more time, pressure, and heat than one might think!
They each brought home a sample of marble and one of slate.
Next week, we will talk about igneous rocks and wrap by reviewing the rock cycle more thoroughly.
Some books you might consider:
Earth's Rock Cycle, Nancy Allen
Granite and Other Igneous Rocks, Nancy Allen
Igneous Rocks, Holly Cefrey
[For those who have experienced problems with trying to grow crystals, I think I know what the problem is! You must actually boil water on the stove. Heating it (even to boiling) in the microwave just won't work. As soon as it boils, stir in enough salt to saturate, then immediately add the yarn (if they need more, they are welcome to get some from me). Use the plastic cup as a drip cup. If you don't have truly boiling water, and if you don't add the string immediately, you are less likely to get any crystals growing on the string.
While the microwave will heat water to the boiling point, as we've all experience, it cools much more quickly than water heated on the stove. That seems to be the reason water heated in this way won't work....]
After studying igneous rocks, we'll be looking at the layers of the earth and then volcanoes in the last two classes for this group.
Regena
Subscribe to:
Posts (Atom)
